Who doesn’t love the irresistible charm of a warm, flaky pastry paired with the creamy sweetness of cheese filling? Whether you’re a seasoned baker or someone who simply enjoys indulging in a delicious treat, the cheese Danish holds a special place in our hearts—and our kitchens. But have you ever wondered about its origins, the secret to its perfect layers, or how to make one that rivals your favorite bakery?

In this guide, we’ll unravel the art and science behind crafting the perfect cheese Danish. From understanding the role of each ingredient to mastering the delicate folding techniques, you’ll gain the confidence to create this classic pastry at home. Ready to turn your kitchen into a haven of golden, buttery goodness? Let’s dive in!
Table of Contents
The History and
Ever wondered how the cheese Danish became the beloved pastry it is today? Its story is as rich and layered as its buttery dough. Originating from Denmark, this flaky delight actually has a fascinating blend of international influences. In the mid-19th century, Austrian bakers introduced laminated dough techniques to Denmark, inspiring local bakers to craft the now-iconic Danish pastry. Over time, the addition of sweet, tangy cheese filling turned it into the cheese Danish we all know and love.
But why does it continue to captivate taste buds worldwide? Here are a few reasons:
- Versatility: Cheese Danish pastries can be enjoyed as breakfast treats, midday snacks, or even elegant desserts.
- Texture Perfection: The contrast of buttery, flaky layers with creamy cheese filling makes it irresistible.
- Universal Appeal: From coffee shops to fine dining, it’s a pastry that fits any occasion.
What Makes a Cheese Danish So Special?
At its core, a cheese Danish is more than just a pastry—it’s an experience. Think about the first bite: the crisp layers give way to a soft, indulgent center, often paired with a hint of vanilla or citrus zest for added depth. It’s no surprise this pastry is a favorite across generations.
Have you ever paused to think about the care and precision that go into making each one? Creating a cheese Danish at home gives you the opportunity to experiment with flavors, fillings, and toppings, making it truly your own.
Fun Fact: Did You Know?
Despite its name, the cheese Danish isn’t exclusively Danish. Similar pastries exist in cultures worldwide, from France’s pain au fromage to Middle Eastern cheese-filled desserts. This speaks to the universal love for the combination of cheese and dough.
Whether you’re a long-time fan or just discovering this pastry, understanding its story and why it stands out is the first step to truly appreciating the art of the cheese Danish. Ready to learn how to make one yourself? Stay tuned for the next section!
How to Make the Perfect Cheese Danish at Home
Does the thought of baking your own cheese Danish feel daunting? Don’t worry—you’re not alone! Many assume these pastries require a professional touch, but with the right guidance, you can easily create bakery-quality results in your own kitchen. Let’s break it down step by step, so you can enjoy the process as much as the final result.
Essential Ingredients for Success
Before we dive into the recipe, it’s important to start with quality ingredients. Here’s what you’ll need:
- Laminated Dough: This buttery, layered dough is the foundation of a perfect Danish. You can make it from scratch or use pre-made puff pastry for a quicker option.
- Cream Cheese Filling: A smooth blend of cream cheese, sugar, and vanilla extract creates the iconic tangy-sweet flavor.
- Egg Wash: For that golden, glossy finish.
- Optional Add-Ons: Lemon zest, fruit preserves, or even a drizzle of icing for extra flair.
Step-by-Step Instructions
Creating a cheese Danish involves a mix of technique and creativity. Follow these steps to achieve perfection:
- Prepare Your Dough
Roll out your laminated dough on a lightly floured surface, keeping it even and thin. The thinner the dough, the flakier the layers. - Cut and Shape
Use a sharp knife or pastry cutter to divide the dough into squares. Fold the corners inward to create a diamond shape or leave them as squares for a rustic look. - Make the Filling
Combine softened cream cheese, sugar, and vanilla extract in a bowl. Mix until smooth and creamy. - Assemble the Danish
Spoon a dollop of filling onto the center of each dough square. Be generous—you want that luscious filling to be the star! - Bake to Perfection
Brush the edges of the dough with egg wash, then bake at 375°F (190°C) for 15–20 minutes or until golden brown. - Add Finishing Touches
Allow the pastries to cool slightly before adding toppings like powdered sugar, a drizzle of icing, or fresh fruit.

Tips for Mastering Your Cheese Danish
- Keep It Cold: Cold dough is easier to work with and yields better layers. Chill your dough between steps if it starts to soften.
- Experiment with Flavors: Swap vanilla for almond extract, or mix fruit preserves into the cream cheese filling for a unique twist.
- Don’t Rush: Baking is an art. Take your time, and enjoy the process—it’s part of the fun!
Why Homemade is Worth It
Sure, you could buy a cheese Danish at your local bakery, but there’s something special about making it yourself. Not only do you get to control the ingredients and customize the flavors, but the sense of accomplishment is unbeatable. Plus, your kitchen will smell like heaven—what’s not to love?
Ready to give it a try? Trust me, your taste buds (and anyone you share with) will thank you!
Creative Variations to Elevate Your Cheese Danish
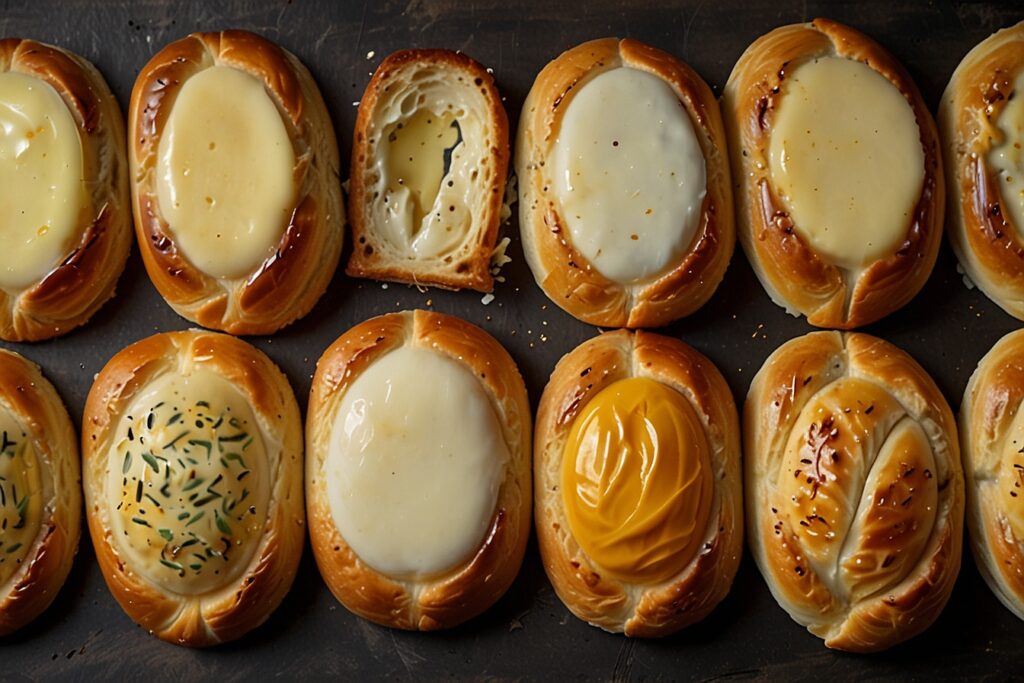
While the classic cheese Danish is undeniably delicious, sometimes it’s fun to mix things up. Whether you’re hosting brunch, baking for a special occasion, or just looking to try something new, creative variations can add a fresh twist to this timeless pastry. Let’s explore some exciting ways to take your cheese Danish to the next level.
1. Fruit-Filled Delights
Adding fruit to your cheese Danish not only enhances the flavor but also adds a burst of color. Here are some popular combinations to try:
- Berry Bliss: Top your cream cheese filling with a dollop of raspberry or blueberry preserves before baking. The sweet-tart balance is unbeatable.
- Tropical Escape: Add diced pineapple or a thin layer of mango puree for a sunny, tropical vibe.
- Apple Cinnamon Swirl: Combine thin apple slices with a sprinkle of cinnamon sugar for a warm, comforting touch.
2. Savory Cheese Danishes
Who says Danishes have to be sweet? Savory versions are just as delicious and make excellent appetizers or snacks. Here’s how you can switch it up:
- Replace the cream cheese filling with a blend of ricotta, feta, or goat cheese.
- Add toppings like sun-dried tomatoes, caramelized onions, or fresh herbs.
- Sprinkle grated Parmesan or cheddar over the top before baking for an extra burst of flavor.
3. Decadent Chocolate Twists
For chocolate lovers, the cheese Danish can transform into an indulgent dessert:
- Mix a little melted dark chocolate into the cream cheese filling.
- Drizzle chocolate ganache over the baked Danish for a luxurious finish.
- Add a sprinkle of crushed hazelnuts or chocolate chips for texture and crunch.
4. Seasonal Favorites
Take advantage of seasonal ingredients to create Danishes that celebrate the time of year:
- Spring: Lemon zest and lavender-infused cream cheese for a light, floral treat.
- Summer: Fresh peaches or cherries paired with vanilla cream cheese.
- Fall: Pumpkin spice cream cheese with a drizzle of maple glaze.
- Winter: Cranberry sauce and orange zest for a festive flair.
Tips for Experimenting with Variations
- Start Small: If you’re trying a new combination, make a small batch first to test the flavors.
- Balance the Flavors: Ensure your fillings and toppings complement the buttery richness of the pastry.
- Have Fun: Let your creativity guide you—there’s no right or wrong when it comes to personalizing your cheese Danish.

Why Variations Matter
Exploring different flavors not only keeps baking exciting but also makes your cheese Danish a versatile treat for any occasion. Whether you’re surprising guests with a unique twist or simply indulging your cravings, these variations allow you to showcase your creativity and love for baking.
Which version will you try first? Or better yet, why not experiment with a few and create your own signature cheese Danish?
Expert Tips for Perfecting Your Cheese Danish
Even with the best recipe, little details can make the difference between a good cheese Danish and one that truly impresses. Whether you’re a novice or an experienced baker, these expert tips will help you refine your technique and create pastries that are as stunning as they are delicious.
1. Master the Laminated Dough
The hallmark of a great cheese Danish is its flaky, buttery layers. Achieving this texture takes some care:
- Chill Between Steps: Cold butter creates the steam pockets that make the dough rise. Keep your dough and butter chilled at all times.
- Roll Evenly: Uneven dough can result in pastries that bake inconsistently. Roll slowly and evenly to maintain uniform thickness.
- Don’t Overwork the Dough: Handle the dough gently to avoid breaking the butter layers or developing too much gluten, which can make the pastry tough.
2. Perfect the Filling Consistency
The cheese filling is the creamy heart of the Danish, and its texture matters:
- Room-Temperature Ingredients: Ensure cream cheese is softened before mixing to avoid lumps.
- Don’t Overmix: Over-beating the filling can introduce air, causing it to collapse during baking. Mix just until smooth.
- Balance Sweetness: Taste the filling before assembly. Adjust the sugar and flavoring to ensure it complements the dough without overpowering it.
3. Shape with Precision
The presentation of a cheese Danish adds to its appeal. Here’s how to nail the look:
- Use Templates: For consistent sizes, use a ruler or cutter as a guide when shaping the dough.
- Seal Edges: If folding or layering, gently press edges together to prevent them from unfolding during baking.
- Decorative Cuts: Add small slits or patterns on the dough for a professional touch.
4. Bake Like a Pro
The baking process can make or break your Danish. Keep these tips in mind:
- Preheat Thoroughly: Ensure your oven is at the correct temperature before baking to help the dough rise quickly.
- Watch Closely: Overbaking can dry out your pastry. Remove the Danish as soon as it turns golden brown.
- Cool on a Rack: Let pastries cool on a wire rack to prevent sogginess from residual steam.
5. Enhance with Finishing Touches
A little extra effort after baking can elevate your Danish to bakery-level perfection:
- Glazes and Drizzles: A simple icing sugar glaze or a drizzle of melted chocolate can add sweetness and shine.
- Fresh Garnishes: Add fresh berries, mint leaves, or a dusting of powdered sugar for visual appeal.
- Serve Warm: Cheese Danishes are best enjoyed slightly warm when the filling is soft and the pastry is at its crispiest.
Baking as a Creative Outlet
Perfecting your cheese Danish is about more than just technique—it’s about expressing yourself through baking. Experiment with textures, flavors, and finishes to make each batch uniquely yours. With these tips, you’re not just baking a pastry; you’re creating a little piece of edible art.
So, are you ready to elevate your cheese Danish game? Start with these tips and watch as your skills (and your pastries) rise to the occasion!
Conclusion
Congratulations—you’ve now unlocked the secrets to creating a truly spectacular cheese Danish! From uncovering its rich history to mastering the art of laminated dough, experimenting with creative variations, and perfecting every detail, you’re ready to bake with confidence.
But the real magic lies in your hands. Will you stick to the timeless classic, or let your imagination run wild with bold new flavors? Whether you’re baking for loved ones or simply treating yourself, each cheese Danish you create is a testament to your creativity and dedication.
Remember, the beauty of this pastry isn’t just in its buttery layers or creamy filling; it’s in the joy of the process. The warm, flaky aroma filling your kitchen, the satisfaction of pulling a golden masterpiece from the oven, and the smiles it brings to those who taste it—these are the moments that make baking truly special.
So, what’s your next step? Head to the kitchen, roll up your sleeves, and turn these insights into action. Your perfect cheese Danish awaits, and with every batch, you’ll discover new ways to make it even better.
Happy baking, and may your kitchen be filled with the delicious aroma of success!

